Installing an entrance door without professional help. Self-installation of metal doors on brick, foam concrete and wood Install an iron door yourself
Have you decided to install a new metal door, but don’t trust third-party installers? No problem! You can carry out all the necessary activities on your own. Read the provided guide and get started.
Dimensions of a new door: important nuances
In order for installation work to proceed as quickly as possible and with minimal inconvenience, even at the stage of choosing a new one, carefully take the necessary measurements.


Before you go to the store, measure the doorway. This work is complicated by the presence of a rather thick layer of mortar around the perimeter and, of course, the door frame. Because of them, it is quite difficult to clearly determine the boundaries of the opening, which causes a number of inconveniences during the measurement process and can distort its results.

To ensure that your measurements are as successful and accurate as possible, please read the following recommendations:
- Before directly installing the structure, we clear the lower part of the opening down to the floor. The material used to raise the chute, as well as the thresholds and other elements will be dismantled;
- increase the top of the doorway, i.e. lifting is prohibited;
- the side parts can be slightly expanded if necessary. Here it is important to determine the width of the supporting transverse element, which is also the upper edge of the doorway. The width of the installed door should be approximately 2-2.5 cm less than the same parameter of the supporting element.
Based on the above, the frame of a new metal door should be 4-5 cm lower and narrower than the opening.
After taking the necessary measurements, proceed to preparing the working tools.
Set for work
- Hammer.
- Tape measure for measurements.
- Sledgehammer.
- Bulgarian.
- Saw.
- Wooden plank.
- Hammer.
Additionally, you need to prepare material to fill the gaps between the walls of the opening and the frame of the new metal door. You can use cement mortar or foam. Foam is more convenient to handle.
Also prepare fasteners. Traditionally, reinforcing bars with a diameter of 1-1.2 cm or metal anchors are used.
Preparing the opening for installing a new door


Let's start dismantling the old door. At this stage we are not particularly careful. We just try not to destroy the walls if there is no need to expand the doorway. Particular care must be taken when working with walls made of bricks and foam blocks.
We remove the old canvas or unscrew the hinges from the door, in accordance with the design features of the door.
Using a saw or grinder, we make several cuts around the perimeter of the door frame, and then remove it from the opening using a crowbar.

Using a hammer drill, we clean the perimeter of the opening from excess old plaster and cement mortar.
At this stage, we pay special attention to the bottom of the doorway. Often, after dismantling the frame, a rotten wooden beam or worn-out masonry is found at the bottom of the opening. We get rid of the damaged elements, and in their place we lay out a new brick or fix a beam of the required height.

Once installed, the new metal door should be flush with the hallway floor. It is important to consider whether the floor will be screeded in the future or whether such work is not provided for.

Main part of installation
At this stage, we enlist the help of an assistant - it is impossible to correctly install a metal door alone.
Read the instructions from our new article.
Door frame fixation options
It was previously mentioned that fastening the box can be done in several ways. In total, 3 main methods are used.
Attachment by lugs
The most common mounting option. The box is attached to the eyes using pins or anchors. New-style metal doors have eyelets welded to the frame.
Fixation is performed in the following order:
- through the hole in the eye, a 10-15-centimeter depression is created in the wall with a perforator;
- A pin or anchor is inserted into the prepared recess. The pin must be prepared in advance. To do this, it is enough to take reinforcement with a diameter of about 1 cm, slightly sharpen one edge of it, and flatten the other with a hammer, forming a head;
- the fastener is driven into the recess until it stops;
- the pin is fastened to the eye by welding, the anchor is tightened with a socket wrench.
The procedure is the same as in the previous method, but holes for fasteners are created directly at the end of the metal box.
Also well suited for mounting a metal door. The box is attached with the outer edge to the opening, and a hook is welded on the inside for fastening to the wall.
This method is optimal for buildings with monolithic walls and eliminates the need to drill holes.
Finishing touches
After securing the box, we hang the canvas and make sure that its movement is correct. To do this, first open the door about 45 degrees, and then 90. It is important that in these positions the door leaf does not move spontaneously.
We make sure that there are no backlashes when the metal door is closed. If there are no problems, we proceed to filling the gaps between the walls and the frame.
For sealing, you can use foam or cement mortar with the addition of alabaster. It is easier and faster to work with foam. However, the solution is characterized by higher strength.
We fill all the gaps with the selected material. To fill with foam we use a special gun. If you use cement mortar, it is best to distribute it with your hands rather than with a spatula or trowel. The consistency of the cement mortar should be such that it does not float. The best option is a loose state, reminiscent of a curd mass.
We check the operation of the locks. We glue a seal around the perimeter of the new door. We fix the external trims. To fix them we use bolts or rivets.
The process of installing a new metal door yourself is almost complete. All you have to do is decorate the slopes on the inside of the doorway at your discretion (plaster, plastic, drywall, etc.). They will allow you to hide the fasteners and give the composition a normal appearance.
Find out the answer to a question of extreme importance in our new article.
Good luck!
Prices for entrance doors
Entrance doors
Video - Installing a metal door with your own hands


The advantages of metal doors over conventional wooden ones are obvious to everyone. They are more durable and reliable, but the main function of a door installed at the entrance is to protect the premises from unauthorized entry. Today in every city there are companies that install metal doors, but if you wish, you can do this work yourself. True, the work is quite complex, requiring significant investment of labor.
When planning to replace the front door, you should immediately decide whether the installation work will be carried out yourself or professionals will be invited. The first option will certainly save a decent amount, but you need to understand that installing a metal entrance door is a very complex and time-consuming task.
Firstly, the parts of a metal door (leaf, frame) have an impressive weight, so they are difficult to install and adjust. Secondly, the door at the entrance must be very reliable to ensure the safety of residents and the safety of property. Therefore, before you begin installing a metal front door with your own hands, you need to really assess your strengths.
Getting ready for installation
- Take dimensions from the opening and purchase or order the manufacture of a metal door.
- Prepare the necessary tools and consumables.
After everything is ready, you will need:
- Remove the old front door;
- Prepare the opening for installation.
Let's look at how preparation should take place.
We purchase materials and prepare tools
If the doorway is of a standard size, then the door can be purchased ready-made, since today there is a large selection of this product in stores. If the opening is non-standard, you will have to order the manufacture of the door.
Advice! If the door will be made to order, it is recommended to invite a measurer from the manufacturer. The fact is that even a small mistake when taking measurements yourself will lead to the fact that the door will not be able to be installed properly.
In addition to the door itself, supplied along with the frame and decorative trims, you will need: 
- Anchor bolts or pieces of iron pins to secure the box in the opening.
- Wedges for leveling and temporarily securing the box.
- Polyurethane foam.
To work with your own hands, you will need to prepare the following tools:
- Construction level (laser is better, but you can also use a hydraulic one);
- Hammer;
- A nail puller or crowbar with a flattened end (crowbar).
In addition, you may need a grinder and a hammer. If the door is installed on welded pins, then a welding machine is required.
We prepare the opening
To install a metal front door with your own hands without any problems, you will need to prepare the opening well. To do this you need: 
- Remove the old door panel;
- Remove the old box. If the box is metal, you will have to break the plaster around it and cut off the mounting pins with a grinder.
- Then you will need to clean the opening from any remaining insulation and plaster.
- Before installation, measure the opening to ensure that it is level.
- If the preliminary measurements were taken correctly, the opening will be slightly larger than the door frame. This is necessary so that there is room for alignment.
Advice! If mistakes were made when taking measurements, you will have to work hard before installing the door. You can widen the opening using a grinder and a special circle for cutting stone, or using a hammer drill. If the opening is too wide, it can be narrowed using a durable cement-based mortar.
Installing a new door
The installation of a metal door begins with the installation of the frame. Then you will need to hang the canvas on the hinges and install the trim.
We fasten the box
Depending on the width of the opening, the method of fastening the box is selected:
- In standard openings, it is recommended to install the frame using welded mounting plates.
- If the walls of the opening are thick and the door is installed indented from the outer wall, then fastening is carried out through holes made in the racks of the frame itself.
In the first case, installing the box goes like this:
- The frame is inserted into the opening so that its edge is at the level of the outer wall, and the pre-welded mounting plates are adjacent to the opening on the inside of the door.
- Using wedges, the box is leveled so that there is a gap of about 2 cm wide on all sides.
- Holes are drilled into the wall through the mounting loop holes. Fastening is carried out by installing anchor bolts or metal pins at least 15 cm long.
 If the box is installed without mounting loops, the work is done in a similar way. The mounting holes in the box slats are usually made by the manufacturer, but if they are not there, you will have to make them yourself.
Fastening the box to welded joints is considered the most reliable. In this case, metal pins with a cross-section of 1.5 cm are inserted into the prepared mounting holes. After which their ends are welded to the mounting plates.
In the absence of a welding machine, fastening is carried out using anchor bolts; after installing and tightening the bolts, their heads are covered with decorative caps to match the color of the box.
Hanging the canvas
Metal doors are produced with already welded hinges. After the hinge post of the box is secured, the door leaf is hung on it. Before you do this part of the job, you will need to pre-lube the hinges.
After hanging the canvas, you will need to check how the locks work. If minor discrepancies are noted, alignment should be carried out using wedges. After final alignment, the lock post is also attached.
Final stage
Before you begin the final cycle of work, you should make sure that you installed the door yourself without errors. If all the work is carried out correctly, the door will open easily, all locks and latches will work properly, and the door leaves will not slam or open spontaneously.
 Having completed the inspection, you can begin finishing work:
- First, we fill the gaps left between the opening and the frame posts with polyurethane foam.
- The dried foam is cut off flush with the plane of the wall.
- The opening is plastered and puttied.
- Decorative trims are installed on the door. Further finishing work is carried out depending on the overall design style of the hallway.
So, if you wish, you can independently install an entrance door made of metal. The work is far from easy. It will be difficult even physically, since metal parts have an impressive weight. In addition, you will need to painstakingly and persistently adjust the door structures, ensuring that they are positioned as evenly as possible.

Installing the front door is a very important stage in building a house. The door must reliably protect against uninvited guests and not violate the integrity of the structure of the house. The choice of door depends on many factors, and the installation of different types of doors has its own characteristics.
1. Entrance doors as a structural element of the house
According to its functions, the entrance door:
- Provides protection from mechanical influences and entry into the house by strangers
- It is an element of the shell of the house, protecting it from external atmospheric influences
- Is an element of the building structure
These basic functions lead to the requirements that must be met for the front door:
- Strength and reliability of locking
- Compliance with the structural features of the house
- Sufficient heat resistance and corrosion resistance
The entrance door is located in the doorway of the external wall of the building. This means that it inevitably makes changes to the structural stability of the house and to the integrity of its shell, as protection from temperature influences. Doorways, like window openings, require structural reinforcement, and are also cold bridges where increased heat exchange with the environment occurs.
Simply put, the entrance door should not compromise the structural stability of any type of building and not compromise its thermal protection.
2. Types of buildings and design features for door installation
Based on their general type, buildings are divided into
- Brick
- Block (foam blocks, gas blocks, etc.)
- Lumber (from logs, sleepers, thick timber)
- Frame
In general, according to the design of the walls, all houses can be divided into monolithic and frame. In the first case, the wall is a monolithic slab, in the second - a hollow frame, the cavities of which can be filled with insulation. In both cases, the structure of the house is stable and durable. Window and door openings, as mentioned, violate the integrity of the wall and require additional reinforcement.
Doorways and their installation in different types of buildings have some differences:
- In fastening doors to openings
- In methods of insulating a door block
This is especially true for entrance doors that directly connect the house with the external environment.
Let us recall the main method of strengthening and insulating doorways. They are usually located vertically and start from the bottom of the wall - either from the floor itself, or from the lower rims of a monolithic wall, and end at a height below the top level of the wall.

Monolithic walls made of bricks or blocks are laid out taking into account the doorway, and in walls made of thick timber or logs, the doorway is cut out after laying the entire frame. The top of the doorway of brick and block walls requires reinforcement so that the bricks and blocks are supported at the top. Typically a metal beam built into the wall structure is used for this purpose. In a log house, such reinforcement is not required, since the upper crowns remain in place. In a frame house, just like in a block house, the doorway ceiling beam is mounted to the side posts. In addition, in the frame, the doorways are reinforced with a crossbar on top and additional racks on the sides.

Rice. The upper covering of a doorway in houses of various types
The frame of the door block is mounted in the doorway thus formed. Obviously, for different wall materials, the fastening of the box may differ, which will be discussed in more detail below.
3. Types of entrance doors
Door blocks are divided primarily according to the type of material from which they are made:
Metal
Wooden
Metal-plastic
Obviously, the different materials from which doors and door frames are made may require different installation and insulation methods.
Let's take a closer look at the features of installing doors made of different materials.
4. Metal doors and their design
Metal doors are considered the strongest and most reliable. This is determined by the properties of the metal itself, as well as the design of the door itself.
The frame, as well as the leaf of metal doors, are made of metal. It is made up of powerful metal corners and beams. The more powerful the door leaf itself, the more powerful the door frame is. It must withstand the significant weight of the door leaf and itself must be very firmly connected to the wall. The metal door frame itself is a rectangular or U-shaped frame made up of metal corners (with a shelf of at least 0.3-0.5 cm), equipped with hinges, mounting ears and a platband.

Today there is a wide variety of metal door panels and accessories for them - from the simplest to the rather sophisticated. In the simplest case, the door leaf can be a metal sheet with welded hinges. Obviously, such a door is not very suitable for a residential building - metal conducts heat well and is a weak sound insulator. However, such doors are quite suitable for auxiliary structures that do not require insulation - utility room, boiler room, garage, etc.
In most cases today, a door leaf with a more complex structure is used as an entrance door. The design of the front door can include many elements, such as:
- A metal sheet
- Loops
- Insulation
- Rigel
- MDF panel
For the door leaf, a sheet of structural steel with a thickness of usually 1.2-2 mm is used. This thickness is sufficient for the required strength of the leaf, and the weight of the door will not be prohibitive. It must be remembered that the excess weight of the door frame puts significant stress on the foundation, as well as on the hinges. On the other hand, the use of sheets thinner than 1.2 mm is not recommended - they cannot serve as reliable protection. Thin sheets of tin can often be pierced with a can opener.
From the inside, the door structure is reinforced with stiffening ribs - metal strips welded around the perimeter (and sometimes onto the inside of the plane) of the door leaf, perpendicular to its plane. Stiffening ribs can be:
- Longitudinal (welded only vertically)
- Transverse (horizontal)
- Combined (welded vertically, horizontally and inclined)
Vertical stiffening ribs do not allow the lower and upper corners of the canvas to be bent. Horizontal - resist pressing of the sheet.
The door leaf can be single or double, when an additional sheet is welded onto the stiffeners from the inside. In this case, a cavity is formed where the insulation can be placed without fastening it. It is worth remembering that the weight of a double door almost doubles.
In especially critical cases, the cavity between the sheets is filled with concrete - such doors are called armored. They are usually placed on safes, but some houses are better guarded by the owner than a safe.

There are other ways to further secure your door. For example, reinforced hinges with a support bearing. The number of hinges depends on the dimensions of the door and the thickness of the leaf, as well as the weight of the external and internal decoration. The minimum quantity for a metal door is three hinges. It is better to install them so that there is no access to them from the outside.
Another way to strengthen the door structure can be anti-removal metal pins. They are placed at the end of the canvas on the hinge side, as crossbars. The pins fit into special holes in the door frame and hold the door closed. As a result, even with the hinges removed, the door cannot be opened from the outside.

5. Thermal insulation of metal doors and external finishing
Metal itself is an excellent heat conductor, surpassing any wall material in this parameter. Obviously, for high-quality insulation of a house, the door itself needs to be insulated - this is especially important for the harsh climate of Russia. Often during the cold season, ice forms on metal doors due to a sharp temperature difference inside and outside the house. Ice when thawing causes moisture to condense on the surface, which leads to corrosion of the metal of the door if it is not lined on the outside. Even the vestibule device does not completely protect the house from the cold from the inside, and the door must be insulated.
There are several ways to insulate a house with metal doors:
Installation of additional plastic or wooden internal doors in the vestibule or installation of a frame for two doors
Installation of insulating inserts into the cavity of the door frame. This can be mineral wool laid between two sheets or sheets of foam glued to the canvas from the inside. A good option is modern door insulation with polyamide inserts in special thermal breaks. This material has low thermal conductivity, and as a result, at an outside temperature of -20 degrees, a positive temperature is maintained inside the house near the door (up to +10 degrees)
Installation of an electric heating system, when a thermal heating cable is laid along the contour of the door and around the locks, as well as inside the frame. Electricity consumption is low - about 5 kW per day, but this system ensures constant heating of the door leaf and frame, and the lock will never freeze. Of course, the installation of such a door will cost more than a regular one, but it will definitely pay off during operation - the cost of heating the house is reduced.

To give the door an attractive appearance, various coatings are often used. Today the market is full of a variety of doors with very attractive finishes. You should know that the finish must withstand significant temperature changes and resist the influence of the atmosphere. It is advisable to choose the appearance of the cladding in accordance with the appearance of the building facade.
The surface of the door can be painted, which will protect it from chemical influences and moisture, although today door panels are often coated with special compounds in special painting chambers. The surface texture can be matte, shiny, or imitate valuable wood species.

6. Features of metal-plastic entrance doors
Modern materials produced by industry today make it possible to find an excellent alternative to metal doors. In particular, doors made of PVC (polyvinyl vinyl) profiles have become widespread. They are made according to the type of plastic windows known to us. They are not inferior to metal doors in strength, durability and appearance, and, in turn, surpass them in specific gravity and resistance to temperature changes, and have better corrosion resistance. The structure of a PVC profile door is similar to the structure of plastic windows.
The strength of the door frame and door frame is provided by profile reinforcement. The door frame is made of a five-chamber profile with a thickness of at least 70 mm. A metal frame in the form of a rectangle is located around the perimeter of the frame. The frame is reinforced using corner pads that provide rigidity. Hinges and additional anti-burglary mechanisms are mounted on the frame.
Triplex glass or armored glass is used as frame filler. For waterproofing, the bags are sealed with a special sealant.
Various fittings are hung on the canvas and the PVC frame - hinges, locks, handles, as well as anti-removal hinges.
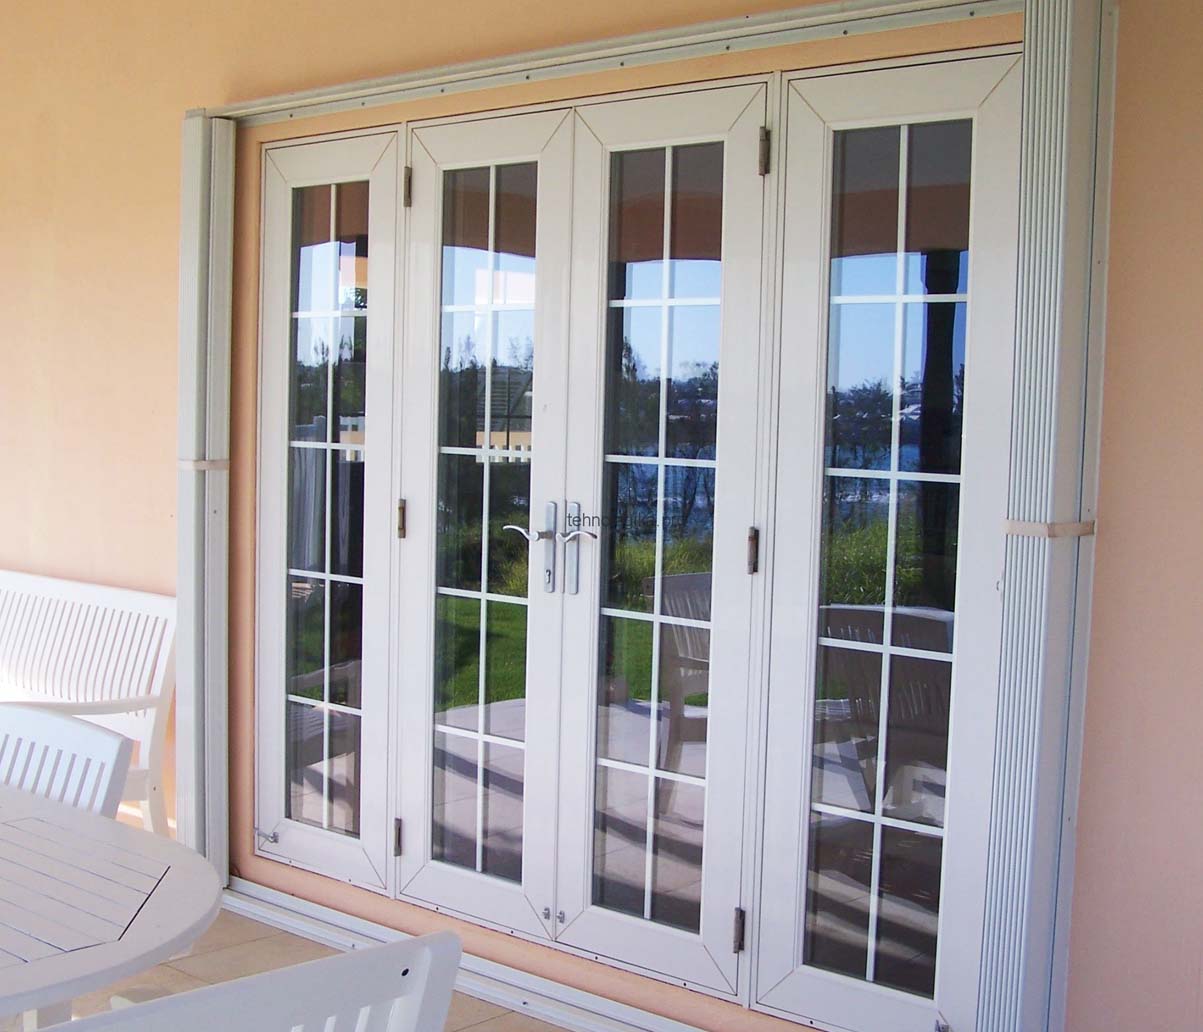
rice. pvc doors
The advantages of PVC doors are undeniable:
- High tightness
- Excellent sound insulation
- Resistance to chemically aggressive influences
- Heat resistance (such doors, like plastic windows, do not require additional insulation)
- Easy to install
- Modern appearance that matches any design.
7. Wooden entrance doors
In modern private houses, especially those intended for permanent residence, it is not recommended to install wooden entrance doors. It is believed that they do not provide sufficient security against burglary and are difficult in terms of thermal insulation.
However, wooden doors remain a fairly popular option for entrance doors. This is due
- The simplicity of their design
- Environmentally friendly
- Thermal insulating properties of wood
- Relatively cheap
It seems that it is still advisable to install wooden doors, especially if measures are taken for their additional structural protection and thermal insulation:
- Use of hard wood such as oak, larch, etc.
- Door trim with durable metal sheet
- Wood paneling
- Creating a reliable seal in the door frame and the joints of the door leaf with the frame
Installation of wooden boxes and canvas is much simpler than those made of metal or PVC profiles. Any home handyman can do it.

8. Features of fastening door frames to various wall materials
Let us dwell on the features of installing doors in openings made of different wall materials.
In monolithic walls, openings are not easy to drill at the end, so fastening the frame requires considerable effort. Victory drills should be used, especially if the fastener gets into monolithic concrete. When laying bricks, the area between the bricks is selected. Often you have to use plugs for screws to secure the box.
It is much easier to install the box if the wall consists of wooden beams or logs. The end of the openings can be easily pierced with nails. The same applies to the side posts of the frame house opening. In wooden houses, the box is simply nailed to the end of the opening. It is better to use long nails - they resist shear loads well, unlike self-tapping screws, which can break.
Otherwise, the installation of doors in different walls does not differ much and includes the following steps:
- Preparing the opening
- Door frame installation
- Checking the verticality of the box
- Hanging the door leaf on the sang.
- Foaming the joints between the frame and the opening for sealing
- Installation of decorative design of the opening - platbands, etc.
9. Burglar resistance of doors
According to the degree of burglary protection, doors are classified into
- Class 1 – which can be opened manually using simple equipment
- Class 2 – protection against the use of simple power tools – such as a drill
- Class 3 – massive doors with internal and external cladding and additional frame reinforcement elements.
To break into doors of class 3 burglary resistance, you will need an electric grinder and at least half an hour of work.
Today, zealous owners are trying to install doors to the maximum in terms of burglary resistance. You just need to keep in mind that the security is protected, but even if you lose the key, you will need a lot of effort to break into your own door. The same applies to fire safety. It is necessary to ensure that the door opens freely from the inside in case of urgent need.
10. Conclusion
As a rule, today they try to treat the installation of doors with great attention. If you are building a large house for permanent residence, it is better to entrust the installation of the front door to professionals - then you will be reliably protected, and your door will be reliably insulated. The appearance will not disrupt the design of your home and site.
There are a huge number of proposals for entrance doors on the market - there are not only metal structures, but also wooden ones. And as practice shows, reliability is determined not only by the quality of the product itself and the materials from which it is made, but also by competent installation. Installing entrance doors is a responsible undertaking, therefore, to ensure that the final result does not disappoint, it is recommended to study the installation instructions.
Measurements and preparation of the opening
So, the old front door no longer fits its purpose both in functionality and reliability. It is necessary to purchase and bring to your house (apartment) a new model, which is selected based on appearance, functionality, and size.
But before you go to the store, you need to take the dimensions of the doorway. You need to get to its ends, which are hidden under the platbands with a layer of leveling mortar and polyurethane foam:
- The platbands are dismantled, there is no need to stand on ceremony with them, they will no longer be useful in the future.
- The plaster layer is removed.
- If foam was used during installation, it will also have to be removed.
- The threshold is dismantled.
The front door stands in front of you, and the edges of the door frame (that’s what a door frame is called in professional language) and the ends of the opening are clearly visible. There is always a gap between them. Now you need to measure the distances between the opposite ends of the opening. This must be done in at least three places with an equal distance between measurements. The same is true with the horizontal direction. From these, the smallest values are selected, which are taken as the basis for the dimensions of the door frame with a deviation of 1-2 cm in the smaller direction.
For example, if the height of the opening turns out to be 2.12 m, then to select the height of the hole, the size of 2.1 m is taken.
The principle of correctly taking dimensions from a doorway
It should be noted that different manufacturers have their own model line, in which each door has its own dimensional parameters. Therefore, the actual dimensions of the opening will have to be adjusted to fit standard door designs from a specific model range.
The difficulty of dismantling the door hatch will depend on what material the walls of the house are built from. If it is gas, foam or expanded clay concrete, then all dismantling work must be carried out with great care - it is important not to spoil the fragile masonry, which is prone to chipping.
 Removing the old box from the opening
 In general, the procedure is as follows:
- the door leaf is removed from the hinges;
- the box is cut with a grinder or hacksaw into several parts.
- The cut pieces are dismantled using a crowbar or crowbar.
Cleaning the doorway
Cleaning consists of removing old fasteners, flimsy plaster mixture and, if any, polyurethane foam from the ends and adjacent areas.
 Old metal fasteners are removed with a grinder
 But if the house is old and the front door has been in use for decades, then it is necessary to check the floor beam that is installed above the doorway. If its quality leaves much to be desired, then you should think about how to replace it. It is better not to carry out this repair operation with your own hands.
Pay attention to the area below the threshold. Typically, in brick houses that have been in use for a long time, wide openings are formed filled with loose brick material, so this debris must be gotten rid of.
Sealing cracks and voids
When all defects in the doorway are discovered, they must be repaired with ordinary cement-sand mortar, which is diluted in a ratio of 1:3 (1 part cement to 3 parts sand). Large voids are filled with broken or solid bricks and mortar. Small ones - only with a cement mixture, the same applies to cracks. Before sealing the latter, it is recommended to use a deep penetration primer. It will not only hold together the grains of wall material, but will also go deeper into the thickness of the concrete, making it more durable.
 If you need to level a large area, you can install guides from boards, securing them with a clamp
 There is no need to level the surfaces of the ends of the doorway. You can raise the floor by pouring screed, or level the area under the threshold.
Installation instructions for entrance doors
Some useful tips before starting installation work:

Installation of the box
First of all, the door must be disassembled into two parts: the leaf and the frame. The latter is installed in the doorway and leveled both vertically and horizontally. In this case, the installation is done on stands made of wood or plastic. It is best if these are cone-shaped inserts, which can be easily knocked out after installation work is completed. Although sometimes craftsmen do not touch them, leaving them in the opening as additional support.
 Brief instructions for installing the door
 Please note that the entrance door is installed flush with the outer surface of the wall. And it should open outward. After alignment, the diagonals of the frame are checked; they must be the same in length.
Methods of fastening the structure
There are several ways, so each should be considered separately. The door frame must be secured to at least 10 points: 2 from the bottom and top and 3 from each vertical end.
Through the eyes
Manufacturers of metal door models offer designs that already include so-called lugs - metal strips welded to the frame, in which holes are made for fasteners. Therefore, the fastening process itself is as follows:
- the planks are bent to the wall surface so that they are pressed as tightly as possible;
- Through the holes, holes are made using a puncher to suit the length of the anchor;
- the latter is inserted through the eye into the hole in the wall and tightened with a wrench.


Instead of anchors, you can use pins made of steel reinforcement. They are driven into the hole, and the ends are welded to the eyes using electric welding. To increase the strength of the fastening, you can pour cement mortar into the hole and then hammer in the pins. If reinforcing bars are used as fasteners, then the depth of the hole should be within 15 cm.
Through a through hole
Some manufacturers of metal entrance doors at the production stage provide through holes in the ends of the frame. If there are none, then you can drill them yourself using a drill or hammer drill.


Through the holes, a puncher makes recesses at the ends of the opening, into which either anchors or pins are inserted. If the front door is made of wood, then only anchors are used for fastening using this method, the nuts of which must be recessed into the body of the frame. Therefore, a hole is widened under them to suit the diameter of the nut, and the seating depth should be equal to the thickness of the fastener. Pins are not used in this case, because there is nothing to weld them to.
Through metal grips
This option for fastening the front door is only possible if a metal edging from a profile steel corner is additionally installed on the outer edge of the opening.
It is necessary to weld metal strips with a width of 3-4 cm, a length equal to the width of the end of the opening, and a thickness of 2-3 mm, at the attachment points to the door sash from the inside. They are welded either perpendicular to the parts of the box, or obliquely. There are no particularly strict requirements here in GOST.
 Fastening to the frame is important for walls made of blocks, read more about this later in the article
 Thus, the box is held on the outside by edging, and on the inside by metal hooks.
And some more useful tips regarding the sequence and correctness of fastening:
- you need to start attaching the box from the side where the hinges are installed;
- the process itself is carried out from top to bottom;
- after each fastening, the box is checked for vertical installation: fasten one side, hang the canvas, check whether it opens well - you can move to the other side of the box; same with the top and bottom.
 It is important! The verticality of all sides of the frame is checked using a level at ALL stages of installation: before fastening to anchors, during fastening and after hanging the canvas
 Completion of the installation process
The check showed that the door is positioned correctly, it opens and closes freely. The door leaf must be removed again, and the surfaces of the door must be covered with masking tape, because it is time to seal the gaps and carry out the finishing touches.
 Foaming must be done on both sides
 - Polyurethane foam fills the gap between the ends of the opening and the frame. It will not only serve as a filler, but also as insulation. By the way, you may find information about how to be useful.
- The same can be done with a cement-sand mortar, to which building gypsum is added. The latter sets quickly, so the solution dries quickly.
- The surface of the gap is puttied to maximum evenness. To do this, you may need to apply the mixture in several layers.
- They make slopes that are painted or covered with decorative material.
- If necessary, add-ons are installed.
- The masking tape is removed.
- From the outside. If the door is wooden, then they are attached to the frame with self-tapping screws, the heads of which are recessed into the wood by 0.5 mm. After which the caps themselves are closed with decorative caps. If the box is metal, then the platbands are attached to it with rivets, screws or bolts.
- Handles are installed on the door, hinges are lubricated.
- The door leaf is hung.
This is a step-by-step technology for installing a door in a brick or panel house.
Installation in openings made of gas, foam and expanded clay concrete
Expanded clay block private house or buildings made of gas or foam blocks belong to the category of buildings with fragile load-bearing structures. Therefore, in order to install an entrance door in them, it is necessary to take into account two important requirements specified in SNiP and GOST:
- Increase the number of fasteners on the vertical sides of the box within 4-6 per side. At the same time, their depth should not be less than 20 cm. To fasten metal doors in a foam concrete wall, you cannot use standard metal anchors, which in soft blocks will quickly become loose due to intensive opening and closing of the door. In such houses, according to the standard, it is better to use chemical anchors, for example Hilti.
- Install a crimping structure consisting of two frames made of steel angles with a flange width of 40 or 50 mm. In fact, it’s the same edging, only on both sides of the wall. Both structures are fastened together by crossbars made of metal plates 3-4 mm thick.

Installation in a wooden house
Installation of the door structure is carried out according to the following scheme:
- A casing is made along the opening - this is a powerful wooden box made of beams.
- The door frame is inserted into it.
- The box is fastened to the casing using long self-tapping screws or self-tapping screws. It is important here that the fasteners do not pass through the casing.
More details about this process can be found in the article.
Accuracy in taking dimensions, a strictly step-by-step order of operations, correct alignment of the door in all planes and reliable fastening of the door are the basic rules for its installation and a guarantee of the quality of the final result.
The front door is a security element of our homes. Therefore, it is important that the front door meets such characteristics and requirements as: reliability, strength, aesthetic appearance, convenience, thermal insulation and sound insulation. And all these characteristics depend not only on the quality and type of the door leaf and door frame, but also on correct installation. No matter how good the door is, inept installation can completely destroy all its good aspects.
When installing a metal door on a building made of brick, wood, gas silicate blocks, foam concrete, etc. It is important to take into account the technological features of the building material, on the basis of which you can decide how to install a metal entrance door and how to pre-prepare the opening.
A metal door block consists of a door frame and a leaf hung on it. Pre-installed fittings undoubtedly facilitate installation, but require frequent and careful alignment of horizontal and vertical lines, and repeated hanging of the door leaf to check the door movement. Control actions cannot be neglected.
Depending on the technical specifics of the load-bearing wall, it is necessary to: strip the plaster down to the brick or artificial stone so that there is a technological gap of 2.0 - 2.5 cm between the door block and the wall; build a door frame in a timber or log building, and then attach a door frame to it with a gap along the ceiling of at least 10 cm. Owners of brick and foam concrete properties will need a hammer drill or electric drill and a chisel with a hammer; the owner of a wooden building, instead of a hammer drill, will need a chainsaw and a hacksaw, instead of a chisel, a chisel.
According to fire regulations, the front door should not create obstacles for forced evacuation, i.e. the front door should open outward. But in snowy areas, the front door is installed so that it opens inward, otherwise after a snowstorm you simply will not leave the house.
It is not advisable to remove the steel door leaf from the packaging material until the installation procedure is completed. However, it is impossible to check the quality of the product this way. Please note that by deciding to install an iron door with your own hands, the owner automatically waives the supplier’s warranty obligations. No claims for scratches or dents after installation will be entertained. It is better to remove the polyethylene, inspect the purchased product, and then attach the packaging back with mounting tape so as not to spoil the decor with a tool or foam.
The preparatory stage is not much different from the standard procedure for installing any door; it includes three traditional stages: preparing the opening with adjusting its dimensions in case of incorrect measurements; fastening the box in the opening using anchor plates, steel rods or self-tapping screws, depending on the building material of the wall and the location of the door frame in the opening; checking the work, adjusting if necessary, foaming the technological gaps and hanging the canvas. Basically, the entrance steel block is placed flush with the outer plane of the wall, but it can also be “recessed” into the opening. The first option involves fastening using anchor plates. The second method predetermines the fixation of the door frame-frame by means of anchor bolts passing through it, which are included with the unit, or steel pins replacing factory anchors. Note. If the door block does not include anchor bolts, you need to buy hardware products yourself, 10-15 cm long. The diameter of the bolts depends on the size of the mounting holes, usually 12-15 mm are used. As an alternative, pieces of steel rod with similar dimensions are suitable.
Installation sequence. We dismantle the old structure if the door is being replaced. We prepare the opening for the upcoming work. The size of the opening should be larger than the door frame by the amount of the technological gap. We place the frame of a steel door without a leaf in the opening, placing wooden wedges around the perimeter. Wedges are necessary to adjust the position and fixation of the box, as well as to ensure technological indentation. We check the horizontal and vertical lines with a building level, shift the wedges in the required direction (drive them deeper or, on the contrary, slightly pull them out). We make sure that the distances from the wall along both jambs are approximately the same. Having adjusted and found the correct position, firmly secure the frame with wedges so that when drilling holes in the wall the box does not move. Through the mounting holes, first of the hinge jamb, we drill holes in the wall for anchors with the appropriate dimensions.
If the manufacturer of the entrance block does not make holes for bolts on the door frame, you need to drill them yourself before starting work. Three each on the false and hinged jamb, 2 each on the threshold and lintel. Insert the bolts and tighten the nuts. We temporarily hang the canvas to check its progress. It should not open spontaneously and require effort to close/open. We remove the canvas, install fasteners on the false side, fix the threshold and lintel. We hang it again to check. If necessary, change the position of the box by loosening or tightening the nuts. Again, we leave only the door frame in the opening and cover it with masking tape to protect it from the mounting foam. We blow out the technological indentations from the wall with polyurethane foam according to the recommendations of its manufacturer, and cut off the excess. After polymerization of the polyurethane foam, we cover all unattractive areas with casing.
The technology for installing a metal entrance door in an aerated concrete house is somewhat different from the traditional method of installing such structures. These features are due to the specific qualities of the materials from which the door itself is made and the building is constructed. Having a cellular structure, aerated concrete is a lightweight and rather fragile building material, and the weight of a standard metal door sometimes reaches one hundredweight. Because of this contradiction, a door installed in the usual way, under the influence of even a slight force, can simply fall out of the doorway. That is why it is preferable to install narrow (up to 1 m) metal doors in houses made of aerated concrete, and install them using special fasteners or additional structures.
Installation of doors in buildings made of gas blocks can be done in one of the three most common ways, namely:
- for special expansion or chemical anchors;
- to the wooden frame of the doorway;
- to a welded metal frame.
Method one. Fastening to anchors
This simple and low-cost method is suitable only for installing lightweight and narrow doors that do not experience heavy operating loads. When using this method, the fastening dowels included with the doors are replaced with special anchors for cellular concrete, which, depending on the principle of operation, can be spacer or adhesive.
When screwed into the wall, the working end of the expansion anchor splits in two and melts away, as a result of which the bolt is fixed in the loose structure of the gas block. For adhesive anchors, holes are pre-drilled in aerated concrete and filled with polymer resin. After curing, such a composite reliably holds the threaded part of the anchor in the wall.
With the help of such anchors, the turf box is secured in the wall opening in a standard manner.
To reduce the absorbency of aerated concrete and compact its structure, before installation, the surface of the opening is treated with a deep-penetrating waterproofing primer.
Method two. Installation on a wooden frame.
If a massive steel entrance door, double doors or garage doors are installed in places where the frame is directly attached to the wall, aerated concrete will experience significant deformation and impact loads, as a result of which its fragile cellular structure will gradually collapse. To prevent crumbling of gas blocks under the heads of anchor bolts, door frames are mounted on wooden panels, frames or embedded beams, which ensure a more even distribution of the load along the entire perimeter of the doorway.
Such intermediate structures are made of wooden beams or planed boards. Before constructing the strapping, the wood is impregnated with a liquid antiseptic and dried well.
Lighter doors are mounted on beams recessed into the surface of aerated concrete or on solid or discontinuous (assembled from individual sections) overlay panels cut into the thickness of the wall, which are laid in the doorway on a layer of special glue, and then additionally secured with bolts for cellular concrete. In the case of installation on separate sections of boards, the empty spaces between the pieces of planks are filled with rigid polyurethane foam.
The metal door frame is attached to the finished wooden frame with powerful self-tapping screws. The heaviest and most bulky doors are mounted on a full frame frame, constructed from thick wooden beams attached to the walls of the opening with adhesive anchors, on an epoxy base.
Method three. Installation on a welded frame.
With this installation method, the doorway is reinforced with a double welded frame assembled from steel corners, tied together with metal strips for strength.
For a standard metal entrance door, it will be enough to weld an installation frame from a 35 or 40 mm steel angle. For a massive reinforced steel door, it is better to take a 50x50 mm corner.
- The corners are cut according to the size of the opening - one set of two long and one short segments is made for the outer side and a second set of the same for the inner.
- The corners cut in this way are placed on the edges of the opening, and their adjacent ends are welded. As a result of this operation, two U-shaped arches are obtained, tightly adjacent to the edges of the doorway.
- The arches are attached to aerated concrete with special anchors and, for strength, they are tied together with short jumpers cut from 3 mm sheet metal.
- The lintels are welded to the corner frames in those places where the door frame will be attached to the opening.
- For greater reliability of fastening, the welded jumpers are also attached to the wall with self-tapping screws, screwing them in so that the caps do not coincide with the mounting holes in the door frame.
- The door frame is inserted into the finished frame, controlling the verticality of the installation with a plumb line. Having adjusted the position of the box, it is fixed in the welded frame with wooden wedges.
- Next, the box is secured in the doorway with powerful 15-centimeter metal screws, which are screwed into the aerated concrete through steel lintels. If the doors are quite heavy, for greater reliability, the screws are screwed not into aerated concrete, but into special dowels, for which holes are pre-drilled in the walls.
To prepare an opening into a wooden structure, you will need a window frame. The need to construct an additional frame for the door frame is dictated by the shrinkage of wooden buildings after construction. Therefore, in the first year, it is generally not customary to equip wooden log houses with doors, windows or finish them. The amount of shrinkage is difficult to calculate in advance; it depends on the period of timber harvesting, the quality of drying of the wood, and climatic conditions. But it is necessary to leave a reserve for the movement characteristic of wood, otherwise the door will jam or the crown located above it, together with the roof, will hang on the door, and a significant gap will appear between it and the previous crown. To prevent the iron door from distorting the structure during shrinkage, it is attached to carriages inserted into a groove formed in the wall. Due to the groove fastening, the carriages will maintain their position during shrinkage movements of the crowns and protect the door frame from turning the bolts upward, which is inevitable if the fasteners “move” down along with the log.
If the opening is formed during the construction period, we select the door structure so that at least 10 cm remains between the lintel and the plane of the opening, and 6 cm remains on each side. For the pigtail we buy 100×150 timber. We will measure and saw off the carriages according to the height of the door. Let's cut a groove with a depth of 5 cm along the central axis of one of the sides of the timber. Carefully use a chainsaw to cut 5 cm on both sides of the log house, approximately a quarter of the width of the wall. We finally form the ridge with a chisel, slowly chipping away the wood. There is no need to rush and forget that if you make a mistake, you will have to buy a door with a larger width and increase the opening. Using a stapler, we fix the tape tow on the ridges. We attach the gun carriages to the wall on top of the tow. We install the steel door according to standard rules, departing one centimeter from both carriages and 10 cm from the top of the door clearance. We attach the frame only to the carriages and the wooden threshold with self-tapping screws. The thermal expansion of wood and metal is different, so it will not be possible to immediately install a metal door accurately so that it does not warp later or begin to jam. And the pigtail will allow you to regulate the vertical movements of the log house. Technological gaps must be filled with tow and cashed out on both sides. After three years, instead of tow, the gaps of the settled opening can be filled with foam, but it is not recommended to do this with a new log house. Indeed, as a result of shrinkage, the foam may crack and its tightness may be lost.