How to properly fold a woodpile on the site: ways to stack firewood. The main ways of stacking firewood Sticking out of a log
If for some reason it is impossible to make a decent place to store firewood, then creating a woodpile with your own hands would be a very good option.
In addition to the fact that the woodpile is necessary for drying firewood, it can also be used in landscape design. How to do it? Everything is very simple, you need to fold the structure nicely and in the right place in the garden.
Firstly, you will not need to go through the entire garden in bad weather (through mud), and secondly, in winter, a wall of firewood will save you time when cleaning the garden path from snow (the woodpile will play the role of a barrier).
In addition, this structure can be used as a base for a table in the barbecue area.
As you can see, a woodpile can be used for very different purposes, so creating such an element of the garden is quite reasonable.
How to fold an ordinary woodpile?
Materials and tools
In order to fold the simplest woodpile for firewood with your own hands, you will need the following tools:
- Joiner's clamp (for convenience)
- Hammer
- A circular saw
- screwdriver
- Self-tapping screws for wood (length depending on the thickness of the boards)
- Roulette
Frame materials:
- Two 3-meter boards, at least 3 cm thick and 10-15 cm wide (base)
- Four 1.5-meter boards of the same thickness and width (side parts of the woodpile)
- One board 1 meter long, 3 cm thick, similar to all other boards.
As soon as all the materials and tools are collected, we proceed to the main process.
Site preparation
To begin with, we select a place for the woodpile. It is recommended to install it on a concrete base (if any) or, in extreme cases, lay out a flat area of red brick.
Such a platform will protect the boards from decay, which can quickly occur with direct contact of the lumber with the ground.
Once the base is prepared, it is necessary to fold the woodpile frame.
Wireframe creation
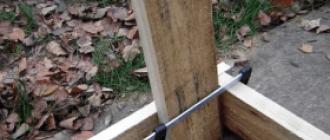
To begin with, we cut a meter board into 4 even parts (25 cm each). The resulting short boards are needed to create the cross members of the frame. If the length of the logs in the woodpile is less than 25 cm, the boards must be shortened so that they are shorter than the material to be laid.


Now you need to assemble the frame. In order for you to clearly see the whole technology, we recommend watching this video tutorial, which shows all the intricacies of carpentry using a screwdriver and a clamp:
Video: how to make a woodpile with your own hands
After creating the frame, it is necessary to lay the woodpile.
Laying technology
Laying a woodpile with your own hands is no less important than creating a frame. The stability of the structure, and, accordingly, the durability will depend on how correctly you fold the logs.
It is recommended to lay the logs close to each other, while laying the longest and evenest lumber from below. The maximum height of our woodpile is 1 meter 30 cm. From above it is allowed to put a slide no more than 20 cm in height. When laying, monitor the stability of the structure. If the log begins to deform the frame, it’s better not to take risks and remove excess materials.
We draw your attention to the fact that the loose stacking of the woodpile after the firewood dries up will make itself felt, because. materials decrease in volume and form voids, due to which the entire building can collapse.
That's the whole technology of creating and laying a simple woodpile for firewood. As you can see, there is nothing complicated, the main thing is to do such work with high quality, conscientiously.

It should be noted that the disadvantage of this design is that it is not protected from rain and snow. For protection, you can put two slate sheets on top, making a small slope of firewood in advance to ensure water flow. Please note that the width of one sheet is 113 cm, so it must either be cut in half (lengthwise) or lay out firewood in two or three rows.
How to fold a round woodpile?
It will take more time to create a round woodpile, but this design looks much more beautiful. Now we will consider the simplest technology for laying such a structure.

Materials and tools
To fold a round woodpile with our own hands, we need the following materials and tools:
- Polyethylene film
- Roulette
- Nail
- Rope
- Marker
In addition to the logs themselves, no other materials will be required, i.e. frame will be missing.
Foundation preparation
First you need to prepare the base. In our example, laying will be carried out on the ground, so it needs to be prepared: remove excess debris and level.
Next, a plastic film is laid on the prepared ground, which will protect the log from direct contact with the soil. Since the object will be round, the excess film must be cut off. To do this, we drive a nail in the center of the piece, and fasten one end of the rope. We fix the marker to the second end of the rope and draw a circle outline. We cut off all the excess, after which the base for the woodpile is considered ready.
Laying technology
In order to fold a round woodpile with your own hands, you must first lay the log evenly in a circle, without going beyond the film. We draw your attention to the fact that the very first row must be laid out with the utmost care and attention. If the row is uneven, this will definitely affect the stability and aesthetic appearance of the entire structure.

After laying out the first row, it is necessary to repeat this event until the height of the building is half a meter. After that, you need to move on to filling the space inside. There is nothing complicated here - lay out the material along the inner diameter, making sure that the logs lie flat.
Then again it is necessary to proceed to laying out the outer ring of the round woodpile and carry out this measure until the desired height of the structure is reached. If the woodpile is too high (about 1.5 meters), it is necessary to alternate the laying out of the outer and inner rings so that no difficulties are created during laying.
In the end, move on to creating the roof of a round woodpile from firewood. To do this, we recommend that you make the inner ring a little higher than the outer one and, using planks, lay out the roof like a tile (as shown in the picture).

If you doubt the stability of the structure, we recommend that you dig wooden posts on the sides, which will serve as a kind of support!
How to make a simple woodpile?
A simple version of the woodpile is the creation of a structure, as in the first version, but only without a frame. The boards will serve as the base, and on the sides you can make stops using the same logs, laying, as shown in the picture.

Properly and beautifully stacked firewood is the key to a hot fire. In an ideal woodpile, they will not get wet, they will not disappear, they will not lose their hot properties.
Dry firewood . If raw firewood is stacked, it will dry out in the woodpile, and the combustion efficiency of such firewood will become an order of magnitude higher.
Kindling is less of a problem. Dry firewood ignites easily and simply in a stove or fireplace.
Is it possible to stack raw firewood? It is possible, but when drying, slender stacks can warp. And a beautiful woodpile - to collapse.
We save usable space. Compact placement of firewood on the site will allow you to collect a fairly decent amount of them, while the chaotic method will be quite voluminous in appearance, but small in terms of the amount of stacked firewood. If you need to save a large amount of firewood, only the woodpile will help out.
aesthetic moment. Plus - beautiful wood-burning walls and woodpile - a real decoration of the site, a full-fledged element of the landscape design of the cottage, village, country house.
In other words, stacking firewood correctly and beautifully is worth it. We will get not only aesthetic pleasure at the sight of neatly stacked firewood in the end - but also a lot of advantages during the heating season.
Parallel way of stacking firewood - stacked
The essence is simple - you can lay each new layer parallel to the previous one.
In this case, the wall of firewood should touch the previous wall. those. laying firewood in the second wall, push it all the way - with its inner end it should touch the previous wall.
Each wall is laid with a slight slope inward. This bias is achieved by selecting uneven firewood.
Outward slope is unacceptable, even slight. With the acquisition of height, the external skew will intensify and the entire wall will collapse.
We do not bring each wall to the top until we adjust the next one. For sustainability. i.e. simultaneously lay out several walls with steps.
It turns out very economically and clearly, a large amount of firewood can fit on a relatively small piece of land.
Perpendicular method - cage
Firewood is laid perpendicular to the previous row.
If you plan to stack firewood in this way - it is desirable to cut them more authentically. Even firewood, of course, is easier to stack.
circular way
Firewood folded in a circle dries perfectly. Especially if you leave a ventilation column of empty space inside the stack.
Ideally, stacked firewood does not flow, but it is not easy to achieve such a density of the top layer of firewood - therefore, novice craftsmen usually cover the firewood with additional waterproof material.
We offer photos of beautiful woodpile! From the photo you can easily understand how the firewood was stacked. Difficulties usually do not arise.


In the private sector, preparations for the heating season begin in the summer. It includes harvesting and finding a place to store a large amount of firewood. For this, the owners equip a separate room, part of a room or yard. And so that the firewood always remains dry, and also in order to save space, you can build a compact, convenient woodpile with your own hands. Its manufacture will not require large expenditures, and the benefits will be noticeable immediately.
Why do you need a woodpile
It serves to protect firewood from precipitation, to ensure good ventilation. The shape, size of the structure can be any, but the location must be chosen carefully so that in the middle of winter you do not have to go through the entire area for firewood. Its correct arrangement is a guarantee that the fuel for a wood-burning stove or fireplace will be constantly dry, not damp, not covered with fungus.
Woodpile in the country is also used as an element of landscape design. Made in the form of an unusual figure, an animal, a table near a barbecue, it will become the highlight of the estate.
Where is the best place to place it?
The place for the construction is selected taking into account the region, the area of \u200b\u200bthe yard, the type and duration of storage of logs, the required level of drying. Woodpile are:
- street;
- portable;
- room;
- stationary.
Photo: woodpile combined with a toilet
Outdoor buildings and separate enclosed spaces are popular. Let's dwell on them in more detail.
On the street
A smart solution would be to place an outdoor woodpile next to the house, along a paved path, so that it would be convenient to replenish supplies in rainy weather. If wood is needed for cooking meat on the grill or barbecue, then it is better to equip the log next to them.
In the case when the design serves only as a decoration for the estate, it should be placed in a recreation area.
An important advantage of the woodpile is the saving of free space. So, a cubic meter of randomly thrown logs will take up 2-3 m 2 of the yard, and in a building 2 m high it will be possible to place the same amount of firewood, occupying only up to a meter of territory. In addition, it is much more convenient to take an armful of stacked logs than to bend down and take them from the ground each time.
Do not make the woodpile too low. The bottom row is completed on a waterproofing material or a raised flooring is made.
In room
An equally convenient option is to place the structure right in the house, arrange it as an interior detail. An example of such a solution is shown in the photo.
You can equip a separate barn for firewood. If logs are needed for heating baths, saunas, then during the construction of these structures, a niche for firewood should be provided inside.
In closed gazebos equipped with a fireplace, the woodpile is made small so that it does not clutter up the space.
Selection of material for the manufacture of the frame
The shelf life of wood, the percentage of its drying depends on the quality of the created product. Therefore, before proceeding with the assembly of the main parts, a detailed drawing of the future design should be drawn up. The image will allow you to see, in time to correct possible shortcomings on paper.

You also need to consider the material for the base. The service life of the product, installation features depend on the type chosen.
Metal
Using metal as a woodpile material has several compelling advantages. Among them:
- long service life;
- resistance to environmental influences;
- Beautiful design.
One of the options is a woodpile for firewood made of aluminum profiles. It can be done in a few hours. It will turn out to be lightweight, so it will be convenient to carry it from place to place.
An interesting solution is a product made of iron or steel. For its construction, you need to be able to handle the welding machine, and purchase the material in the store. If the possibilities allow, then it is worth drawing a picture of the future design and turning to specialists for help.
Tree
It is in the greatest demand among the owners of country houses. Often in every yard there are remnants of building materials made of wood, so the woodpile will come out inexpensive, because it can be made from the available raw materials. Suitable beams, boards, bars.

In addition to the low price, among the advantages of a wooden woodpile are:
- fast assembly;
- the possibility of manufacturing a portable structure;
- a light weight;
- long service life;
- profitability;
- neat appearance.
This material needs pre-treatment, periodic maintenance, as it is not resistant to moisture and insects.
A typical woodpile made of wood is a canopy. It consists of a frame, a roof, one or two walls. The last element is made of boards or lathing with thin strips for better ventilation. For covering use slate, polycarbonate, metal sheets, awning, polyethylene. Laying the foundation for the canopy is not required.

The building must be placed in such a way that the firewood in it has a constant air exchange, a minimum percentage of humidity.
The order of stacking firewood in the woodpile
Proper stacking of logs in tiers will extend their shelf life and ensure the dryness of the wood.

- Firewood is stacked close to each other - a stack.
- If this is a street woodpile, then it must have a stable frame. Otherwise, it will need to be placed next to the fence, other buildings, so that the logs do not crumble.
- The structure should not have a height of more than 2 m - it is inconvenient to get firewood from there. Its optimal height is 1.5 m.
- The lower tier is formed from even and longest chumps, dies.
- You should not stuff a woodpile with a mountain. Excessive weight leads to deformation of the structure.
- Firewood is stacked on a prepared base of bricks, wood.

If you neglect the advice, then the consequences of improper installation will be a damaged woodpile and scattered firewood.
Making a frame for storing firewood
For self-construction, you need to prepare materials and tools in advance so that in the process of work all accessories are at hand. You will need:
- a circular saw;
- screwdriver;
- roulette;
- hammer;
- wood screws;
- boards 3 cm thick, 11-15 cm wide.
Since the woodpile is made of wood, it is better that the platform under it be made of brick, concrete, and tile. So the structure will not rot. When the base is ready, you can start assembling the frame.
Boards for it are pre-cut to the indicated length:
- 2 pcs. 3 m each (base);
- 4 things. 1.5 m each (sides);
- 1 PC. - 1m.
The latter must be cut into 4 pieces of 25 cm each. These parts are useful for creating transverse structural elements. Further, all the elements are interconnected by self-tapping screws. The frame is ready.
To make a cover, it is important to lay the last rows of firewood under a slope.
As a roofing material, a wave slate 1.13 m wide or a dense plastic film is suitable.
We assemble a woodpile without a frame
If you do not want to make supports for the storage, then you can be patient and lay out the blocks in the form of some kind of figure.

The laying technology is as follows:
- The first 3 rows are tightly packed together.
- The next row is formed perpendicularly. This little trick will allow you to raise the edges and prevent the firewood from falling apart.
- 2 more rows are made in the standard order.
- The last row is perpendicular.
As a result of this alternation, a semicircular woodpile is obtained.
Features of laying round firewood
This form of the product is more suitable for decorating the site than for long-term storage of firewood. In these designs, laying is carried out directly on unprotected ground, which is why firewood quickly absorbs moisture, dampens and rots.

But if it is decided to make a round woodpile, it is worth considering the basis for it. The most inexpensive would be plastic film flooring.
The diameter of the building is selected individually, depending on the amount of firewood, the place on the estate.
The support of the structure is a pin that is driven into the ground. A rope with a stick is attached to it. With the help of such a compass, a circle is drawn within which masonry will be carried out.

Logs need to be stacked systematically. They should be the same size, fit snugly against each other.
The formation is performed in rows around the perimeter of the circle. The frame for this is being built.
The result is a structure in the form of a tower or a barrel.
Video: a master class on assembling a woodpile
Photo gallery of finished products
The design performs a decorative function on the site. She was given the appearance of a fabulous house.

The fireplace wall is filled with firewood. This placement gives the room a cozy look, and firewood is always at hand. In addition, the tree looks great as a finishing material.

The original solution of concrete rings allows you to compactly fold the logs and decorate the backyard.

Mobile woodpile is only gaining popularity. It is good because it does not take up much space. The colors are determined by the interior design.

Design Ideas
Each owner decorates the storage for firewood due to his imagination and capabilities. And it does not matter if it is in the yard or in the house.
A small forged woodpile will serve as a bench, chair.
If you stack firewood outside the house on a pallet, and equip it with boxes on top, you can compactly place things in these boxes, and protect the firewood from precipitation and moisture.
Barrels are also equipped as a woodpile. If you have a lot of barrels, then keep in mind that they will make an original divider of the estate territory into zones. By the same principle, well rings made of concrete are used.
A niche for solid fuel near a fireplace or stove will become appropriate.
Small logs can be collected in bundles, decorated with colored ribbons and folded into several tiers.
There is no limit to the decor ideas of such structures, because each owner is based on his preferences, the free area of \u200b\u200bthe site or room, the volume of material for the firebox, and the woodpile, made independently, will become an author's work in a single copy.
A well-known tongue twister on the grass does not advise chopping wood. It is also not worth storing them on the lawn - it is better to fold the woodpile. This structure will not only ensure the proper storage of fuel, but also visually decorate the site. So, do-it-yourself firewood for a summer residence (with photo) - we offer several ideas for its construction.
The best period for logging, including firewood, is just the end of autumn and winter. At this time, it contains the minimum amount of moisture for the whole year. Autumn cold will not let you forget about the preparation of firewood. And even if in winter you visit the dacha on short visits, or your house was transferred to gas heating, the lively aroma of the fireplace, wood-fired sauna and barbecue are difficult to replace.
Not all firewood is the same
In order for the supply of firewood to last for a long time, you need to choose and store them correctly. Different types of wood have different heat capacities. That is, from two logs the amount of heat you can get is different, they will flare up at different speeds and give off heat. This is affected by the density and moisture content of the wood. The greater the density it has, the longer it will burn and the more heat it can give. Oak is the leader in density among the species available in the middle lane. True, such firewood costs a lot.
The most common species are birch, aspen, alder and conifers. Birch has a high density wood, it burns for a long time and the heat gives a lot. Conifers - spruce and pine - are medium-hard species. But because of their resinousness, they often “shoot” with coals and smoke, so they are best used in a closed firebox. Aspen and alder have soft wood, but they give a wonderful aroma. They are good for fireplace and cooking. They are also famous for being able to clean chimneys.
You cannot determine the density of wood by eye, but different types can be distinguished by color and bark residue. Differences in the color of wood, by the way, can be used as a decorative move - a do-it-yourself woodpile or firewood rack for a fireplace will look more interesting if you make strips of different types of firewood when laying.
It is also important how the wood is chopped. This also affects the rate of ignition, duration and quality of combustion. And also - for the convenience of their storage. Even logs of approximately the same size are much easier to fold into a neat, and most importantly, safe woodpile. When making a do-it-yourself woodcutter for a summer residence, make sure that it is stable and reliable.
When choosing firewood, it is important to ensure that it is stored in the right conditions. It would seem that what will happen to the wood? But rotten, rotten and damp logs are of little use. By the way, regarding the quality, size and storage conditions of firewood, there is even a separate GOST.
How to store firewood
The main factors for storing firewood are dryness and good ventilation. To ensure them, a site with good drainage is chosen for the woodcutter, not prone to wetting and puddle formation. In addition, it is advisable not to stack logs directly on the ground.
It is good that there is room for ventilation below. It is convenient to lay firewood on a permanent or temporary impromptu podium made of beams or boards laid at intervals on supports. It is also desirable to protect the woodpile from precipitation by constructing a light canopy or simply laying waterproofing material on top. From natural materials, large pieces of tree bark are perfect for this.
It is pointless to store fresh, not dried firewood in a woodpile and use it - they flare up badly, they give little heat, but they smoke a lot. Before the logs go into the oven, they must dry well. If you bought fresh-cut firewood, let it mature.
In this case, it is worth separating the dying fuel and what you are using. It is not necessary to distribute them geographically, the main thing is that you do not have to sort when you need to flood your fireplace. If you are still confused, you can check by knocking the logs against each other: dry ones make a more sonorous sound.
Where is the best place to set up a woodcutter?
It is advisable to decide on the place of storage of firewood in advance. This will allow you to unload them nearby, and then take them nearby. First of all, decide if you need a stationary woodshed in which you will store your stock of firewood year after year. In this case, albeit not too complicated, but complex construction work will be needed. Or it will be enough just to put firewood in a woodpile.
And in the future arrange it in a new place. In any case, the supply of firewood should be easily accessible and be close enough to the places of use - houses, baths, barbecue areas. A comfortable solid path should approach it. Do not forget about the main conditions - dryness and ventilation. It is good to provide lighting in case firewood is needed in the evening.
1. Extension to the house
It is convenient to build a woodshed adjacent to the house or bath. In this case, it is enough to make light walls on both sides and a canopy between them. Being warmer, the wall of the building will contribute to better drying. But a solid closed shed for storing firewood is not suitable. Therefore, no matter how hard you strive for solidity, the woodcutter must remain permeable - its walls are built with latticework, leaving wide gaps between the boards or gaps in the brickwork. It is also impossible to "clog" it with firewood too tightly.
A good option to attach a stationary firewood shed to a bathhouse or barn is to simply extend the roof overhang. Or even beat the common roof in such an original way as in this photo - here both the shed and the woodshed are combined together, and a garden is laid out on the arc green roof. The resulting cavity should be left through for ventilation.
A through frame, open on both sides, is one of the most convenient forms for a stationary woodcutter. And openness remains, and logs will not go anywhere. This option is suitable for both traditional architecture and modern geometry. The difference will be mainly in the materials. In the first case, take wood and stone, in the second, concrete and metal will do.
2. Wall woodpile
Along the long wall of a building or a fence, an ordinary straight woodpile for firewood with your own hands can be arranged, as in the photo - in one layer. The wall will give her support and provide stability. In this case, the side walls are not needed at all - two poles or boards will be enough for fixing. If the roof overhang is enough to protect the firewood from rain, then it will not be necessary to cover them from above.
The ends of the logs create a beautiful texture, so the wood-burning woodpile will also be an additional decoration for a solid monotonous wall. But remember: beautiful woodpile should not be too high. You will take firewood from above so as not to disturb the stability of the firewood rack, which means that it should be easy for you to get it.
3. Free constructive spaces
A convenient place to store firewood is under the open edge of raised terraces. And close to home, and dry enough, and easy to get. But when stacking firewood in such places, leave gaps so that the terrace is also sufficiently ventilated.
The space under the stairs, outdoors or in the house, also seems to be created for the woodcutter. The ladder will serve as a canopy for a supply of firewood. But it is worth using the entire depth of this space only if the staircase is very narrow. Remember not to store firewood too tightly packed.
4. Woodpile solo
A separate firewood rack for a summer residence is also good. Both from the point of view of convenience, and from the point of view of decorative effect. It is better ventilated, but it must also be laid in one or two logs in thickness. The main problem of such a woodpile for firewood is stability, therefore an even base is especially important for it. Equal-sized even logs make the task easier.
If the firewood is of different sizes, you can stack them by combining sections of logs of different sizes. The appearance of such a woodpile will be even more interesting due to the diverse rhythmic pattern. To ensure stability, a frame is created from poles or boards installed at its ends.
If it is not possible to arrange a raised base, it is made from the logs themselves, laying them down along the masonry. The subsequent layers are laid across, trying to “fit” the logs well to each other. For additional reliability and ventilation, in some places you can alternate the direction of the logs, laying a horizontal fragment along the masonry. It is not worth chasing heights in order to maintain stability and ease of access.
Such a free-standing firewood shed (photo above) will become not only a place for neat storage of fuel, but also an object of zoning. This is another reason not to make it too high. With the help of a wood fence, you can highlight individual corners of the garden without fencing them tightly. And most importantly - such zoning will be mobile in the long run. When the firewood runs out, a new masonry can be arranged elsewhere. The appearance of the wood fence will change every time you take the next portion of the logs. Beautiful woodpile is easy to vary in height, or by shortening individual fragments of masonry.
5. In shape
A more stationary, but very unusual wood-burning fence will turn out if you put logs in similar rings fastened to each other. You can use old tubs or cut flat barrels without a bottom for this. Such storage of firewood will allow you not to worry about stability, and it provides excellent ventilation. But, of course, this option is less spacious than a solid woodpile. But when the firewood is spent, there is still an interesting structure that will zone the site, or decorate it like a sculpture.
A similar design can also be used near the wall, fixing one or more of these storage containers on it.
6. In an old closet
If we turn to recycling, then why not use the body of an old cabinet as a small woodcutter, decorating it with carved trim, as in the photo, or decorating it differently at your discretion. It is convenient to use such a woodpile locally or if you need very little firewood.
An excellent combination of the two previous storage methods will be a through rack with square cells. The same as for books and trinkets in the interior. He will place firewood freely and reliably, and support zoning if you put it not against the wall, as in the photo below, but freely - as a screen.
7. Dome woodpile
To make the woodpile turn into a real sculpture and a really unusual object, fold it in the form of a hemisphere or dome. As an example - firewood in the photo. A similar stack-like form of storing firewood was used in monasteries in very ancient times. It is really good for storing a lot of fuel. Like a haystack, this woodpile is stable and compact.
To fold it, draw a circle on the ground and lay out its diameter with logs - end to end with small gaps. The pole in the center is optional, but will provide an additional axis of stability. Make a smaller ring inside. This will be a support for ventilation.
Then start laying out the logs in a circle, with the ends towards the center. Lay out the inner ring next. Lay several layers like this. The inside can be left empty, or fill it with loose firewood. Gradually, layer by layer, begin to move the ring of logs towards the center to form a dome, while giving them a slope towards the inside due to the different heights of the outer and inner rings. Gradually close the dome. From above, such a woodpile, like an ordinary one, should be covered from precipitation.
8. Built-in firewood
In addition to the main wood storage, it is convenient to allocate an “operational” supply, which will be located in close proximity to the stove, fireplace or barbecue. Firstly, here the firewood will additionally dry out due to the heat and their smaller volume. Secondly, there will be a supply of logs at hand to throw into the firebox.
Often, such local storages are provided for already at the stage of furnace construction. To do this, niches of various shapes are arranged in it - vertical, horizontal and even arc, as in the photo below.
In addition to providing storage space for firewood, these niches give the stove a more interesting look. They make the shape more plastic and diversify the surface texture.
In the barbecue area or summer kitchen, there is a good place to store firewood under the benches or countertops. If this area is large enough and surrounded by built-in benches around the perimeter, they will hold a large enough amount of fuel. A good reason to opt for benches, not chairs, for this area.
Near the fireplace for a supply of firewood, you can arrange with your own hands low mantelpieces running along its sides. In addition to beautiful and tidy storage, they, along with a fireplace screen, will help protect the fuel from sparks. Such protection is important both in the house and next to outdoor fires.
9. Portable containers
For a small supply of firewood, portable containers can also be used. They won't hold a lot of fuel, but they won't need to drag a crumbling bundle from the woodpile. It is convenient to place such a container near the fireplace, having prepared in advance the necessary portion of firewood for the firebox. Choose the shape depending on the style of the surrounding space: rustic baskets, painted boxes, or elegant forged firewood racks, as in the photo.
This is a good object for creative self-expression - such a do-it-yourself firewood rack is quite simple to do. She will decorate the area in front of the fireplace and complement the warm comfort of the hearth with her handiwork.
It is better to start harvesting firewood at the very end of autumn. It is worth splitting them before laying for storage. It is necessary to try to withstand a thickness of about 6-10 cm, and a length of no more than 40 cm.
Firewood from different types of wood gives off different amounts of heat when burned.
So, hardwood has the highest heat transfer. These are oak, beech, hornbeam, yew, ash, birch, apple, pear.
Such exceptionally hard species as beech and oak are difficult to prick, they do not flare up very quickly, but because of their density they give long-lasting smoldering coals. Much softer and easier to process cherry, elm, sycamore, fir and cedar.

But elm and cherry wood emits a lot of smoke when burned, and fir throws out burning sparks. Softwoods (spruce and pine) are even softer. It gives off little heat when burned. But there is a lot of soot that settles inside the fireplace or stove. Having prepared firewood, you need to save it.

Freshly cut firewood has a moisture content of 50%. To dry, you need to keep them outdoors for a year or in a room that is well ventilated. During storage, firewood is stacked in a woodpile.

You can drive four stakes near the wall of the house or barn, which will support the woodpile from the sides. Bricks or stones are laid down so that the firewood does not absorb moisture from the soil and does not become damp. You can also stack firewood in a “stack”.

Outwardly, it really looks like a haystack.

To do this, firewood is laid radially, like chamomile petals, creating a slight rise in the center so that rainwater flows from such a woodpile. Logs are stacked row after row, like tiles. Creating an overlap of the next row on the previous one.
If the woodpile is not under a canopy, it must be covered. For example - roofing material or polyethylene. In this case, the side surfaces must be open for drying.
A woodpile is usually arranged near the wall of a house, a courtyard building or a blank fence. Four stakes are driven in near the wall, which should hold the logs on both sides. To prevent the lower logs from being on damp ground, bricks or stones are placed under them.

In the woodpile, the logs are laid with the ends outward so that they are slightly tilted. The stakes limiting the logs should not bend under the pressure of the logs, therefore, branched birch branches are laid on the rows of logs at approximately the same distance from each other.

Their forks, like loops, wrap around the stakes, pressing the branches with the upper rows of logs. This fastening method is well known in the northern regions of Russia. To give the woodpile stability, logs are also placed in it with a “cell”

The woodpile continues to build up until the top logs are under the very eaves.

If the woodpile is built near the fence, then some kind of waterproof material is placed on top of it, protecting it from moisture penetration from above, for example, sheets of tin or roofing felt.

When it turns out that so much firewood has been prepared that it is not possible to put it in the wall woodpile, then a woodpile is arranged from the rest of the firewood in an open place, somewhere not far from the house.
From a distance, free-standing woodpile can be mistaken for haystacks

A similar form for the woodpile was not chosen by our ancestors by chance. The ends of the logs, going to the surface, lay down so that they formed a kind of roof, along which rainwater flowed down.
In the woodpile, logs are also stacked so that they have a slight slope. Such woodpiles are now being laid out in many regions of our country.

If, say, in the Smolensk region, a woodpile in the form of a mop is more common, then in Kaluga, in addition to the traditional "mop", you can find woodpile in the form of round houses with vertical or beveled walls
The cone-shaped top of such woodpile is constructed from logs according to all the rules of roofing art.
The logs are stacked in a circle in rows like tiles or wood chips, with the next upper row overlapping the lower one.
Of course, a woodpile with a similar roof, and besides, with walls sloping inward, more reliably protects firewood from rain, it is better ventilated, but unlike a mop woodpile, it is less stable.
The sizes of the woodpile are the most diverse - from two to five meters high. There are also larger woodpile, which can rather be compared with haystacks.
Perpendicular way - with a stand

Logs are stacked perpendicular to the previous row.

If you plan to stack firewood in this way, it is desirable to cut them more authentically. Flat firewood is easier to stack.